
Zapier, Make और n8n के साथ Open Badges को ऑटोमेट करें (No-Code रेसिपी)
Typeform completion, Stripe purchase, या Mailchimp tag से बैज इशू होना ट्रिगर करें — तीन काम करने वाली no-code रेसिपी, हर एक 10 मिनट से कम में तैयार।
 लेखक: Nacho Coll
 Nacho founded Badges Ninja to make issuing verifiable digital credentials as simple as a single API call — Open Badge v2.0 badges and certificates, minted, hosted, and verifiable without standing up your own issuer infrastructure.
यदि आप कोई training program, कोई paid course, या tier वाली email list चला रहे हैं, तो जिस पल कोई व्यक्ति कुछ पूरा करता है, खरीदता है, या qualify करता है, वह पल आमतौर पर कहीं न कहीं पहले से ट्रैक हो रहा होता है — एक form response, एक Stripe charge, एक Mailchimp tag। बैज को उस event से अपने-आप जारी हो जाना चाहिए। ऐसा शायद ही कभी होता है, क्योंकि “credential issue करना” ज़्यादातर tools में एक native action नहीं है, और एक बार की automation के लिए custom webhook receiver बनाना ज़रूरत से ज़्यादा है।
Zapier, Make, और n8n बिल्कुल इसी काम के लिए हैं। ये तीनों सीधे Badges Ninja API को call कर सकते हैं — न कोई plugin, न middleware server, न ही कोई code deployment। नीचे तीन काम करने वाली रेसिपी दी गई हैं जिन्हें आप आज ही copy कर सकते हैं, साथ ही API key handling और error-retry behavior भी, जिसे सही तरीके से सेट करना ज़रूरी है ताकि बैज चुपचाप issue होने में fail न हों।
आप असल में क्या जोड़ रहे हैं
हर रेसिपी एक ही पैटर्न फॉलो करती है: trigger → (optional) recipient lookup → /awards पर HTTP POST। /awards endpoint ही असल में recipient को बैज issue करता है — आप इसे किसी मौजूदा badgeId की ओर point करते हैं और यह अपने खुद के verification URL, QR code, और PDF certificate के साथ एक unique, verifiable award बना देता है। अगर आपने अभी तक कोई बैज नहीं बनाया है तो API quickstart देखें; इनमें से किसी भी automation के चलने से पहले आपको उसकी ID चाहिए होगी।
तीनों platforms के लिए authentication एक जैसा है: एक X-Api-Key header, जिसमें आपके dashboard से generate की गई key होती है। Automation platforms किसी भी arbitrary REST API के लिए OAuth flows को अच्छी तरह handle नहीं करते, इसलिए यहाँ API keys ही सही fit हैं — long-lived, आपके account तक scoped, और अगर कभी कोई Zap गलत behave करे तो एक क्लिक में revoke हो सकती हैं।
पहले API key बनाएं
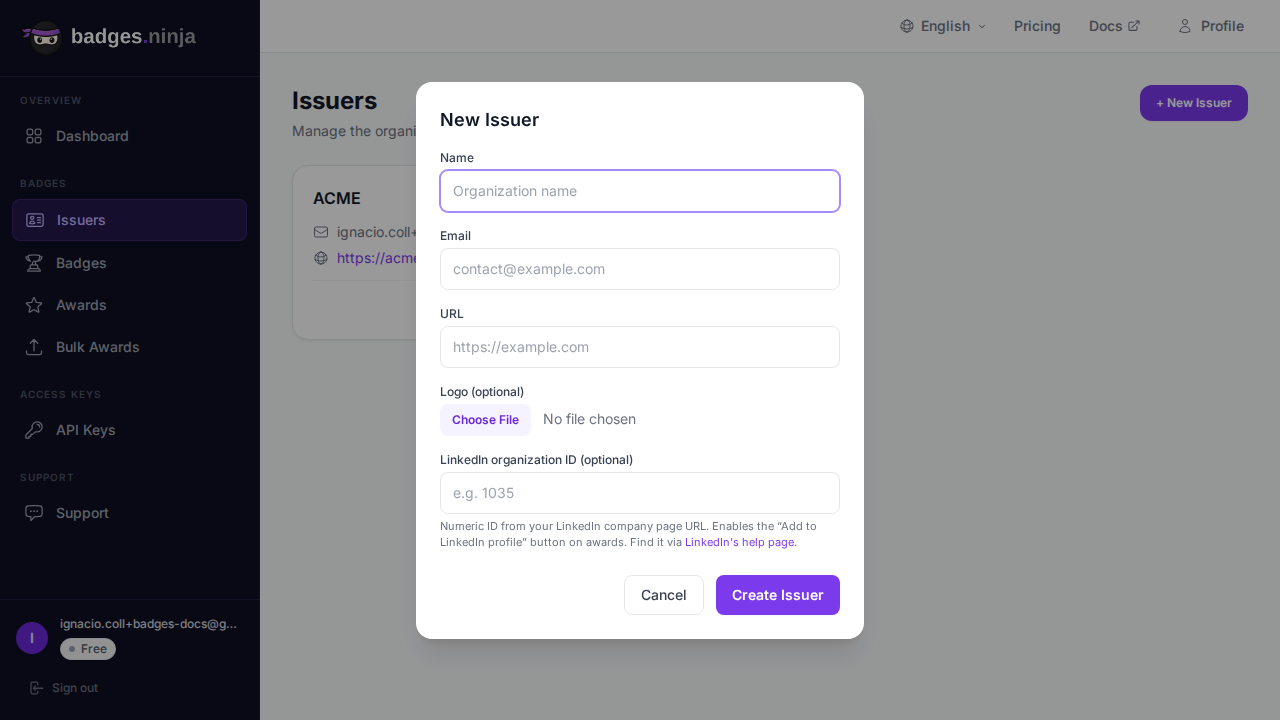
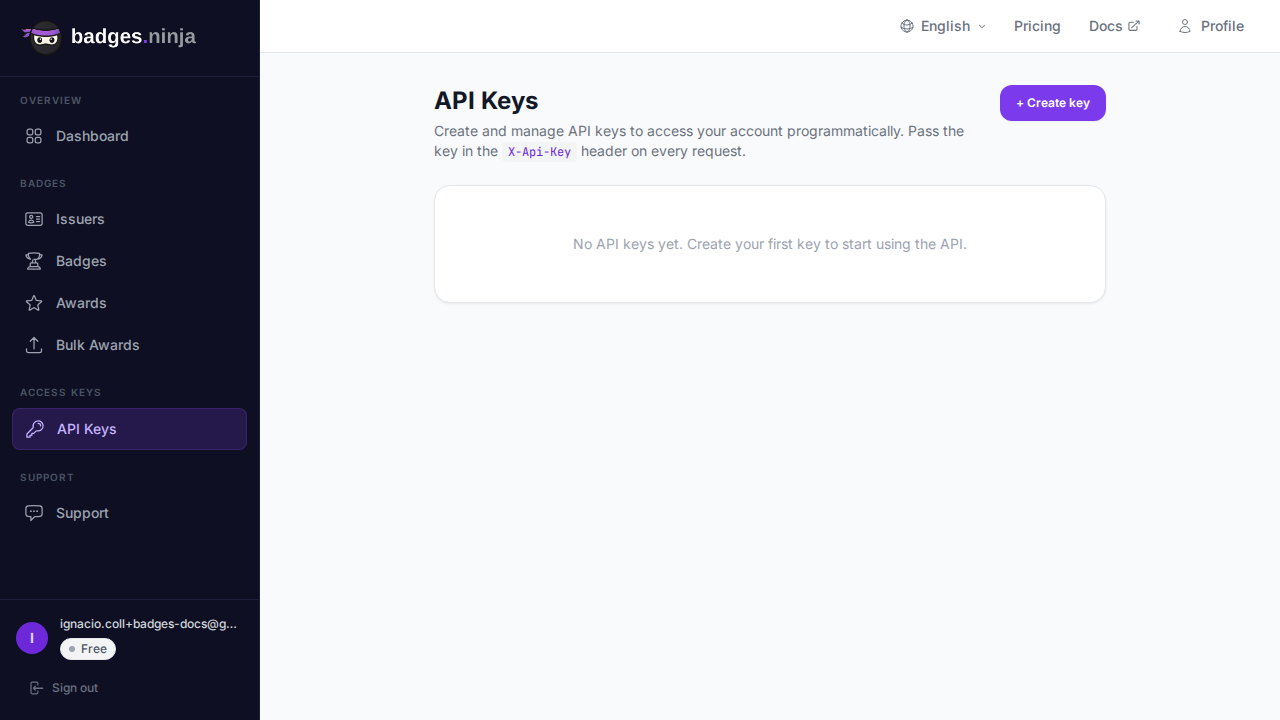
अपने dashboard से Settings → API Keys खोलें, Create Key पर click करें, और उसे उसके काम से मिलता-जुलता नाम दें — key1 नहीं, बल्कि zapier-course-completions जैसा कुछ। यह naming सुनने में जितनी छोटी बात लगती है, उससे कहीं ज़्यादा मायने रखती है: अगर छह महीने बाद कोई automation गड़बड़ करे, तो आप चाहेंगे कि सिर्फ उसी key को revoke करें, बिना उन तीन अन्य integrations को तोड़े जो संयोग से वही key शेयर करती हैं।
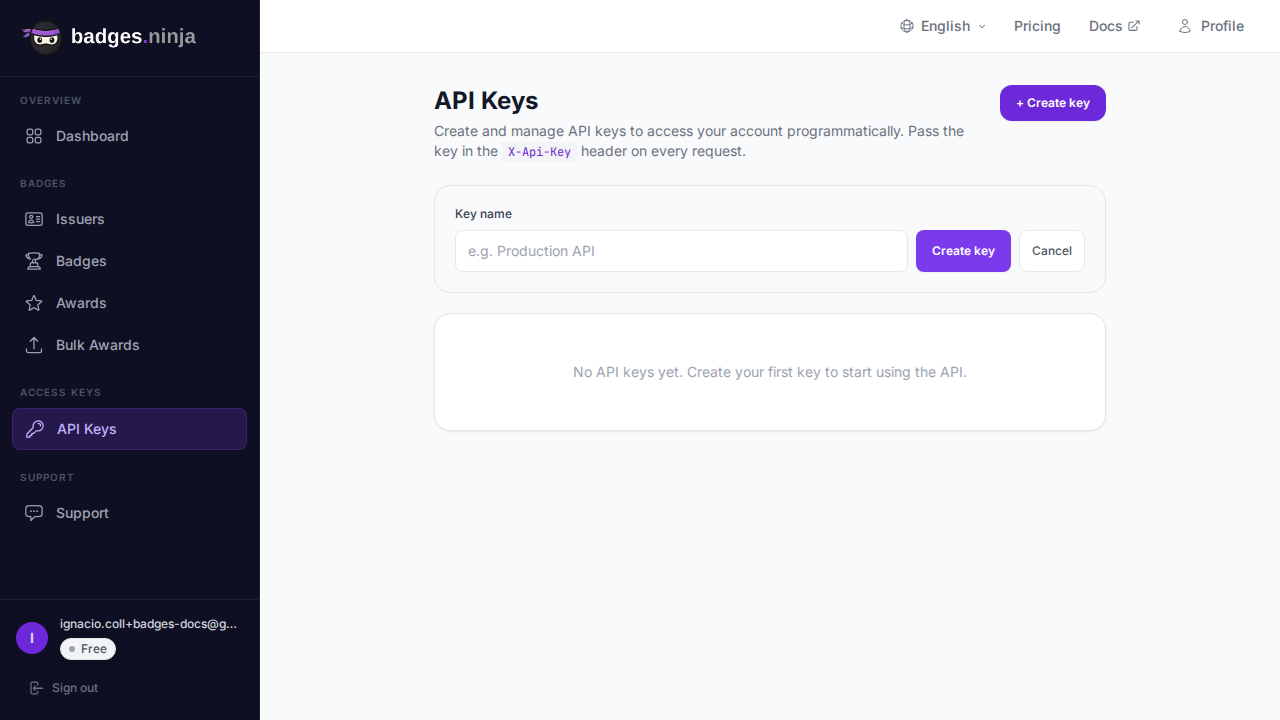
Key create होने के तुरंत बाद सिर्फ एक बार, पूरी तरह दिखाई जाती है। इसे तुरंत अपने automation platform के secure credential store में copy करें — Zapier के “Connection” में, Make के “Connection” में, या n8n के किसी credential में — कभी भी Zap/scenario/workflow के अंदर किसी plain-text field में नहीं।
रेसिपी 1: Typeform → Badges Ninja (cohort completion form)
Use case: एक cohort कोई course पूरा करता है और एक छोटा-सा “I completed this” form भरता है (या फिर self-paced track के आख़िरी step के रूप में आप एक form भेजते हैं)।
Zapier में:
- Trigger: Typeform — New Entry, अपने completion form तक scope की गई।
- Action: Webhooks by Zapier — POST।
- URL:
https://api.badges.ninja/awards - Headers:
X-Api-Key: bws_<आपकी key>,Content-Type: application/json - Data (Typeform के fields से map करें):
{
  "badgeId": "bdg_9f2a1c",
  "recipient": {
    "name": "{{typeform_name}}",
    "email": "{{typeform_email}}"
  },
  "issuedOn": "2026-08-27"
}
बस इतना ही पूरा Zap है। अगर form सिर्फ असली completions पर ही fire होता है तो filter step की ज़रूरत नहीं — लेकिन अगर यह एक general contact form है, तो webhook fire होने से पहले किसी hidden field या answer value को check करने वाला Filter by Zapier step जोड़ें, ताकि spam या test submissions से बैज issue न हों।
रेसिपी 2: Stripe → Badges Ninja (purchase = credential)
Use case: कोई paid certification exam, कोई premium course tier, या कोई membership plan, जहाँ बैज उस चीज़ का हिस्सा है जिसे लोग खरीद रहे हैं।
Zapier में:
- Trigger: Stripe — New Charge (subscriptions के लिए New Invoice Payment Succeeded)।
- Filter: charge amount, credential वाले product की exact price के बराबर हो — यह तब मायने रखता है जब आपका Stripe account एक ही webhook से कई products handle करता है।
- Action:
https://api.badges.ninja/awardsपर, ऊपर जैसे ही headers के साथ Webhooks by Zapier — POST। - Data:
charge.billing_details.emailऔरcharge.billing_details.nameकोrecipient.email/recipient.nameमें map करें।
इशूएंस को किसी payment event से जोड़ने का अच्छा पहलू यह है कि यह स्वाभाविक रूप से idempotent जैसा ही है। Stripe charge IDs unique होती हैं, इसलिए अगर आपको यह चिंता है कि किसी retried webhook पर Zap फिर से fire हो सकता है, तो /awards को call करने से पहले यह check करने वाला एक Storage by Zapier step जोड़ें कि क्या वह charge ID पहले ही process हो चुकी है।
रेसिपी 3: Mailchimp tag → Badges Ninja
Use case: जब subscribers कोई milestone हासिल करते हैं — किसी webinar में शामिल हुए, कोई drip sequence पूरी की, तीन लोगों को refer किया — तब आप उन्हें manually (या किसी और automation के ज़रिए) tag करते हैं, और चाहते हैं कि वह tag खुद API को छुए बिना एक बैज को trigger कर दे।
Zapier में:
- Trigger: Mailchimp — New Tag Added to Subscriber, किसी specific tag (जैसे
webinar-attended) तक filter की गई। - Action:
https://api.badges.ninja/awardsपर Webhooks by Zapier — POST। - Data:
subscriber.email_addressऔरsubscriber.merge_fields.FNAME+LNAMEको recipient fields में map करें।
यह pattern recognition programs के लिए काफी popular है — sales SPIFFs, community milestones, event attendance — जहाँ team में कोई पहले से ही contacts को tag करने की आदत रखता है, और आप बस चाहते हैं कि बैज उसी आदत से बिना किसी extra काम के अपने-आप निकल आए।
Errors और retries को handle करना
Automation platforms आपके बैज data के साथ transactional नहीं होते, इसलिए वही discipline बनाएं जो आप एक असली integration से चाहेंगे:
- Response code check करें।
200का मतलब है कि award create हो गया;4xxका मतलब आमतौर पर गलतbadgeIdया malformed email होता है — यह Zap की एक configuration bug है, जिसे बिना सोचे-समझे retry नहीं करना चाहिए।5xxको safely retry किया जा सकता है। - Zapier: fail हुए Zap runs पूरे request/response के साथ Zap History में जाकर दिखते हैं। temporary failures के लिए Auto-Replay on करें, लेकिन repeated failures पर email/Slack alert भी set करें, ताकि चुपचाप टूटा हुआ Zap तीन महीने तक missing badges का कारण न बने।
- Make: scenarios एक native Error Handler route सपोर्ट करते हैं — HTTP module पर Resume या Rollback directive attach करें, और persistent failures को सिर्फ discard करने के बजाय किसी notification module पर route करें।
- n8n: चूंकि यह self-hosted या ज़्यादा granular control वाला cloud version है, HTTP Request node को एक Error Trigger workflow में wrap करें, और failed payloads को किसी lightweight fallback store (Airtable, Google Sheets) में लिखने पर विचार करें जिसे आप manually replay कर सकें।
तीनों में, “green चला मतलब काम कर गया” वाले trap से बचें। किसी गलत configure हुए webhook step (गलत URL, missing header) से आया 200 जैसा response फिर भी Badges Ninja की तरफ fail हो सकता है। किसी भी नई automation के पहले महीने में dashboard की award list को हर हफ्ते spot-check करें।
Make.com equivalent
Make का visual scenario builder ऊपर दिए गए Zapier steps से लगभग सीधा मेल खाता है:
- Trigger module — Zapier trigger जैसा ही, Typeform / Stripe / Mailchimp watch module।
- HTTP → Make a Request module — Method
POST, URLhttps://api.badges.ninja/awards, headers Headers table में set होते हैं (X-Api-Key,Content-Type: application/json), body trigger से mapped variables के साथ raw JSON के रूप में। - Stripe amount check या Typeform पर “real completion” guard के लिए modules के बीच optional Filter।
यहाँ Make का फायदा visibility है — scenario editor आपको इसे on करने से पहले ही हर step पर actual JSON payload दिखा देता है, जिससे किसी गलत field mapping को debug करना Zapier के ज़्यादा linear, step-by-step test view की तुलना में कहीं तेज़ हो जाता है।
n8n equivalent
अगर आप इसे self-hosted रखना चाहते हैं, या अपने stack के दूसरे हिस्सों को पहले से ही वहीं automate कर रहे हैं, तो n8n सबसे सही fit है:
- Trigger node — Typeform Trigger / Stripe Trigger / Mailchimp Trigger (सभी built-in nodes)।
- HTTP Request node — Method
POST, URLhttps://api.badges.ninja/awards, authentication को Header Auth पर set करें, जहाँ आपकीX-Api-Keynode में hardcode करने के बजाय एक n8n credential के रूप में store होती है, JSON body trigger node के output को reference करने वाले किसी expression से बनती है। - IF node (optional) — ऊपर जैसा ही completion/amount guard, HTTP Request node से पहले रखा गया।
चूंकि n8n credentials encrypted होती हैं और workflows के बीच reusable होती हैं, अगर आप एक से ज़्यादा Badges Ninja automation प्लान कर रहे हैं तो यह ज़्यादा clean option है — credential एक बार set करें, और हर उस workflow में reuse करें जिसे बैज issue करने हैं।
Native app के बजाय generic webhook step क्यों
Zapier, Make, और n8n तीनों के पास app marketplaces हैं, और स्वाभाविक instinct यही होता है कि generic HTTP/webhook module अपनाने से पहले एक “Badges Ninja” app खोजी जाए। उस search को skip कर दें — इतने छोटे REST API के लिए (एक issuer बनाओ, एक बैज बनाओ, एक award बनाओ, बस इतना ही), एक generic webhook step आपको दस मिनट में live कर देता है, बिना किसी third-party app maintainer पर निर्भर हुए कि वह API changes के साथ तालमेल बनाए रखे। एक dedicated app एक ऐसी abstraction layer जोड़ देता है जिसकी आपको ज़रूरत नहीं — आप फिर भी वही badgeId, recipient.email, और recipient.name fields भर रहे होंगे, बस JSON body के बजाय एक form के ज़रिए। API reference इतना छोटा है कि पांच मिनट में पढ़ा जा सकता है, और एक बार यह कर लेने के बाद, raw HTTP approach असल में कम fragile होता है — Badges Ninja API में किसी बदलाव और आपकी automation के फिर से काम करने के बीच कोई app-store approval cycle नहीं होता।
Live करने से पहले test करें
ऊपर दिया गया हर platform आपको किसी असली trigger event का इंतज़ार किए बिना एक single test execution चलाने का तरीका देता है:
- Zapier — एक sample record खींचने के लिए trigger step पर “Test” इस्तेमाल करें, फिर exactly एक असली request भेजने के लिए webhook action पर “Test” करें। Zap को on करने से पहले check करें कि award आपके dashboard में दिख रहा है या नहीं।
- Make — scenario को manually एक बार चलाएं (“Run once” button) एक sample bundle के साथ, और actual response body देखने के लिए HTTP module के output bubble को inspect करें।
- n8n — test input data के साथ HTTP Request node पर “Execute Node” इस्तेमाल करें, जिससे आप request और response को editor के अंदर ही inline देख सकते हैं।
उस पहली test run में दो चीज़ें check करने लायक हैं: कि आपने जो badgeId hardcode किया है वह असल में उसी बैज का है जो आप सोच रहे हैं (किसी duplicated Zap से बची हुई stale ID एक common mistake है), और यह कि recipient email field एक असली address खींच रही है, न कि किसी mapping typo की वजह से unresolved रह गया {{email}} जैसा कोई placeholder। दोनों mistakes automation platform के “success” indicator में invisible होती हैं — HTTP call हर हाल में 200 ही return करती है — इसलिए एकमात्र reliable check यही है कि आप dashboard में award खोलकर confirm करें कि recipient वही है जिसकी आप उम्मीद कर रहे थे।
Duplicate बैज से बचना
ऊपर दिया गया हर trigger source, real-world conditions में, एक ही event के लिए एक से ज़्यादा बार fire हो सकता है — Stripe timeout पर webhooks retry करता है, Typeform slow connection पर double-submit कर सकता है, अगर कोई tag हटाकर फिर से जोड़ा जाए तो Mailchimp automations फिर से trigger हो सकती हैं। अगर आपका बैज issuance idempotent नहीं है, तो नतीजा यह होता है कि recipients को एक ही credential दो बार मिल जाता है, जो देखने में sloppy लगता है और support email बढ़ाता है।
सबसे clean guard एक lookup-before-create step है: /awards POST से पहले, अपने खुद के award records के against एक Search action जोड़ें (Zapier में GET request के ज़रिए “Find Award”, या Make/n8n में equivalent HTTP GET) — अगर आप इसके लिए API query नहीं करना चाहते, तो एक lightweight Google Sheet या Airtable log भी ठीक काम करता है, जिसमें वही Zap successful award के तुरंत बाद लिखता है। अगर उस recipient + बैज combination के लिए पहले से कोई record मौजूद है, तो दोबारा issue करने के बजाय एक no-op पर branch करें। यह सिर्फ पांच मिनट का addition है, और यही फर्क है एक ऐसी automation में, जिस पर आप बिना देखे भरोसा कर सकते हैं, और एक ऐसी automation में, जिसे आपको लगातार babysit करना पड़ता है।
जब no-code काफी नहीं होता
ये रेसिपी single-event triggers को अच्छी तरह cover करती हैं। लेकिन जब आप एक ही CSV export से सैकड़ों बैज issue कर रहे हों — कोई graduate होता cohort, कोई conference attendee list, कोई bulk CE-credit renewal — तो automation platform को skip करें और सीधे bulk badge upload इस्तेमाल करें: यह किसी batch के बीच में pause और resume हो सकता है और browser tab बंद होने पर भी बना रहता है, जो no-code webhook loops volume पर उतनी अच्छी तरह handle नहीं कर पाते।
अपना पहला verifiable credential issue करने के लिए तैयार हैं? badges.ninja पर मुफ़्त में शुरू करें — visual designer, public verification page, PDF certificate, Open Badge v2.0 output। किसी credit card की ज़रूरत नहीं।
लेखक के बारे में
Nacho Coll
Founder & Engineer at Badges Ninja
Nacho founded Badges Ninja to make issuing verifiable digital credentials as simple as a single API call — Open Badge v2.0 badges and certificates, minted, hosted, and verifiable without standing up your own issuer infrastructure. Writes about the Open Badges spec, credential verification, and running a credentialing platform serverless on AWS, from the operator side of the wire.