How to Add a LinkedIn "Add to Profile" Button to Your Open Badges
Set your LinkedIn organization ID once on your issuer profile and every award page renders an Add-to-LinkedIn-Profile button. Recipients click once and the credential lands in their Licenses & Certifications.
 By Nacho Coll
 Nacho founded Badges Ninja to make issuing verifiable digital credentials as simple as a single API call — Open Badge v2.0 badges and certificates, minted, hosted, and verifiable without standing up your own issuer infrastructure.
A recipient who just earned a credential is at their most motivated point in the entire lifecycle of that badge. They finished the course, passed the exam, hit the milestone — and for about thirty seconds, they want the world (or at least their network) to know. If the next step is “download a PDF, open LinkedIn, click Add profile section, manually type the certification name, issuing organization, and credential URL, and hope you didn’t typo the date,” most of them close the tab instead.
The LinkedIn “Add to Profile” button removes every one of those manual steps. Recipients click once, LinkedIn opens a pre-filled certification dialog, they confirm, and the credential appears in their Licenses & Certifications section — with the correct issuing organization, the correct name, and a link straight back to your public verification page. On badges.ninja, this isn’t a separate integration you have to build. It’s one field on your issuer profile.
What the button actually does
LinkedIn’s “Add to Profile” feature works off a specifically formatted URL. When someone clicks it, LinkedIn reads a handful of query parameters — certification name, issuing organization, issue date, and a certification URL — and opens the “Add certification” form with those fields already filled in. The recipient reviews it, hits save, and it’s live on their profile.
The part that trips most issuers up isn’t the URL format — it’s the “issuing organization” field. LinkedIn doesn’t accept an arbitrary company name string for this; it wants your organization’s LinkedIn Company Page, resolved by ID, so the credential shows your logo and links back to your official page instead of rendering as unlinked plain text. That’s the one piece of information a badge platform needs from you before it can generate a working button, and it’s the one step this walkthrough covers.
Step 1: Find your LinkedIn organization ID
If you manage a LinkedIn Company Page for your organization, the ID is visible in your own admin view:
- Go to your organization’s LinkedIn page and click Admin tools → View as member (or navigate to it directly while logged in as an admin).
- Look at the URL. For a company page it will look like
linkedin.com/company/12345678/admin/— the number is your organization ID. - If you don’t manage the page yourself (a partner runs your LinkedIn presence, for example), ask whoever does for the numeric ID rather than the vanity URL slug — the vanity name (
/company/acme-training/) and the numeric ID are different things, and the button needs the number.
Keep that ID handy. It’s the only new piece of data you need.
Step 2: Paste it into your issuer profile
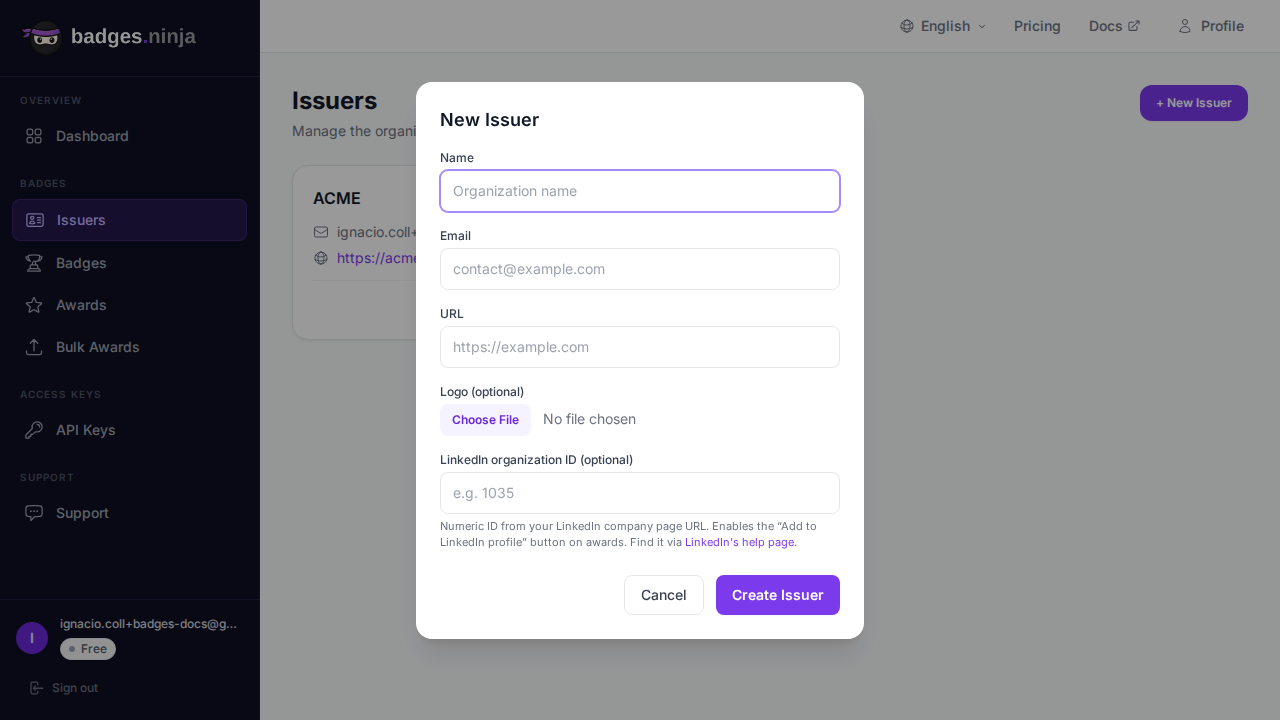
Every issuer in badges.ninja has a settings page. Open your issuer, and add the LinkedIn organization ID field alongside the rest of your issuer details — name, email, logo. This is the same form you filled out when you first registered the issuer, so if you’re revisiting it, you’ll recognize the layout.
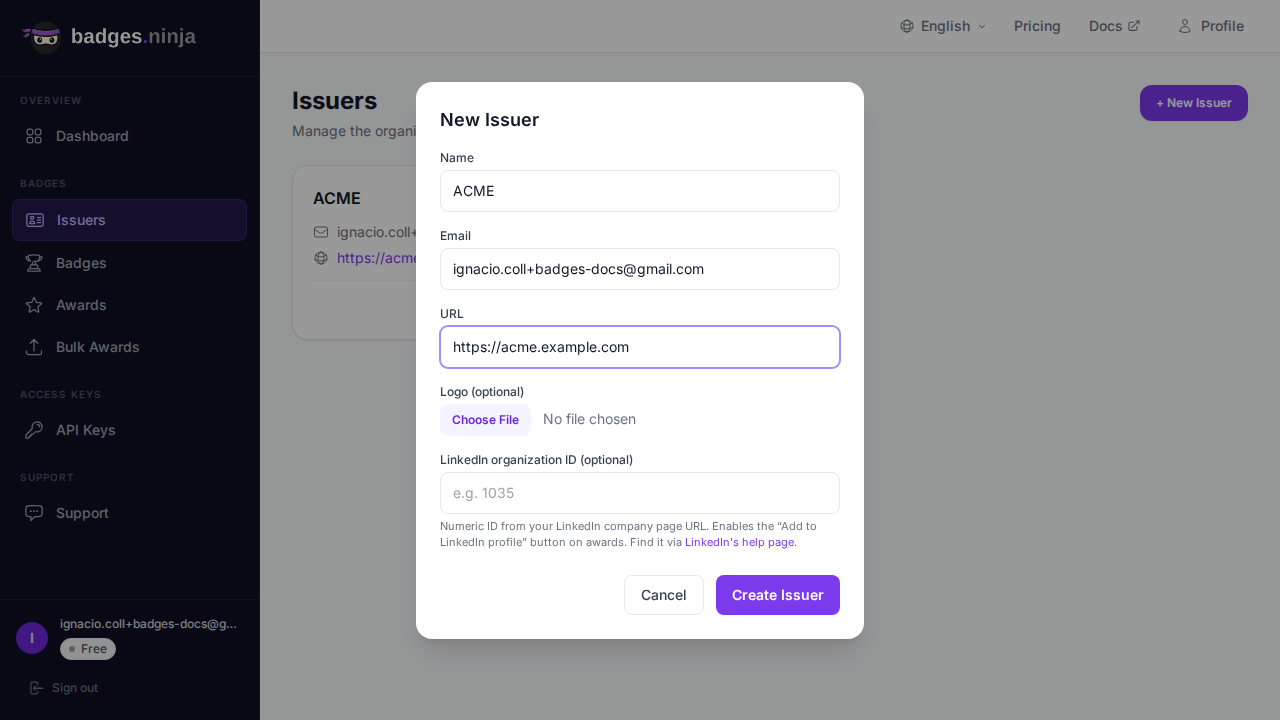
Save it, and you’re done. There’s no separate LinkedIn OAuth flow, no app review, no API key exchange with LinkedIn’s developer console. The organization ID is a public identifier — you’re not authenticating as your LinkedIn page, you’re just telling badges.ninja which company page to reference when it builds the pre-filled URL for your recipients.
Because the field lives on the issuer, not on individual badges, it applies retroactively. Every award tied to that issuer — past and future — picks up the button automatically the next time its verification page renders. You don’t need to re-issue anything or touch individual badge classes.
Step 3: What the recipient sees
Once the organization ID is set, every award’s verification page and PDF certificate for that issuer includes an Add to LinkedIn Profile button. Here’s the flow from the recipient’s side:
- They open their award — from the recipient portal at badges.ninja/me, from the emailed verification link, or from the public verify page.
- They click Add to LinkedIn Profile.
- LinkedIn opens its native “Add certification” dialog, pre-filled with the credential name, your organization (with logo, correctly linked), the issue date, and the credential URL pointing back to the public, verifiable award page.
- They review and click Save.
No copy-pasting a badge name. No guessing what to put in the “credential URL” field. No risk of a typo turning a real credential into an unverifiable line of text on their profile. The whole interaction takes under ten seconds, which matters — every extra step between “I earned this” and “this is on my profile” is a point where recipients drop off.
A quick word on troubleshooting
Two things cause the button to misbehave, and both are worth checking before you assume something’s broken:
- Wrong ID format. If you paste the vanity slug (
acme-training) instead of the numeric ID (12345678), LinkedIn’s prefill either fails silently or resolves to the wrong organization. Always grab the number from the admin URL, not the public page URL. - Page visibility. If your LinkedIn Company Page is unpublished or still in draft, LinkedIn can’t resolve the organization reference even with a correct ID, and the certification will show up unlinked. Publish the page first, then set the ID.
Beyond that, there’s nothing to maintain. The button isn’t a live integration that can go down — it’s a URL badges.ninja constructs at render time from public, stable identifiers. There’s no LinkedIn API quota to worry about, no token to refresh, no webhook to monitor.
Compare that to the manual path
Without a pre-filled button, a recipient who wants to add your credential to LinkedIn has to do this by hand: open LinkedIn, go to their profile, click Add profile section → Licenses & Certifications → Add, then manually enter the certification name (hopefully matching your badge’s exact title), search for your organization by name (and hope it resolves to the right page — LinkedIn’s search returns similarly named companies constantly), pick an issue date from memory, and paste in a verification URL they have to go dig up from an email or a downloaded PDF.
Each of those steps is a chance to abandon the task. Get the organization name wrong and the credential either shows as unlinked text or attaches to the wrong company. Skip the credential URL and there’s nothing for a recruiter to click through to verify. The manual path isn’t impossible — plenty of people still do it — but it’s friction, and friction is exactly what kills sharing rates on credentials that are otherwise free marketing for the issuing organization.
The pre-filled button removes every decision point. The recipient doesn’t choose what to type; they confirm what’s already correct.
Why this matters beyond a nice recipient experience
Every credential added to LinkedIn is a small, durable advertisement for the issuer. It shows up in the recipient’s network feed, sits permanently on their profile under your logo, and links back to a public verification page that anyone — a recruiter, another prospective learner, a partner organization — can click through to confirm it’s real. That’s Open Badge v2.0 doing exactly what it’s designed to do: making a credential portable and independently verifiable, rather than trapping proof of achievement inside a platform only the recipient can see.
Issuers who set up the LinkedIn organization ID field consistently see meaningfully higher share rates than issuers who leave recipients to do it manually — not because the credential itself is more impressive, but because removing five minutes of fiddly manual entry converts intent into action. If your program depends on alumni visibility, employer signaling, or word-of-mouth growth (bootcamps, certification bodies, conference organizers), this one field is one of the highest-leverage changes you can make to your issuer setup.
A note on badge design and the LinkedIn preview
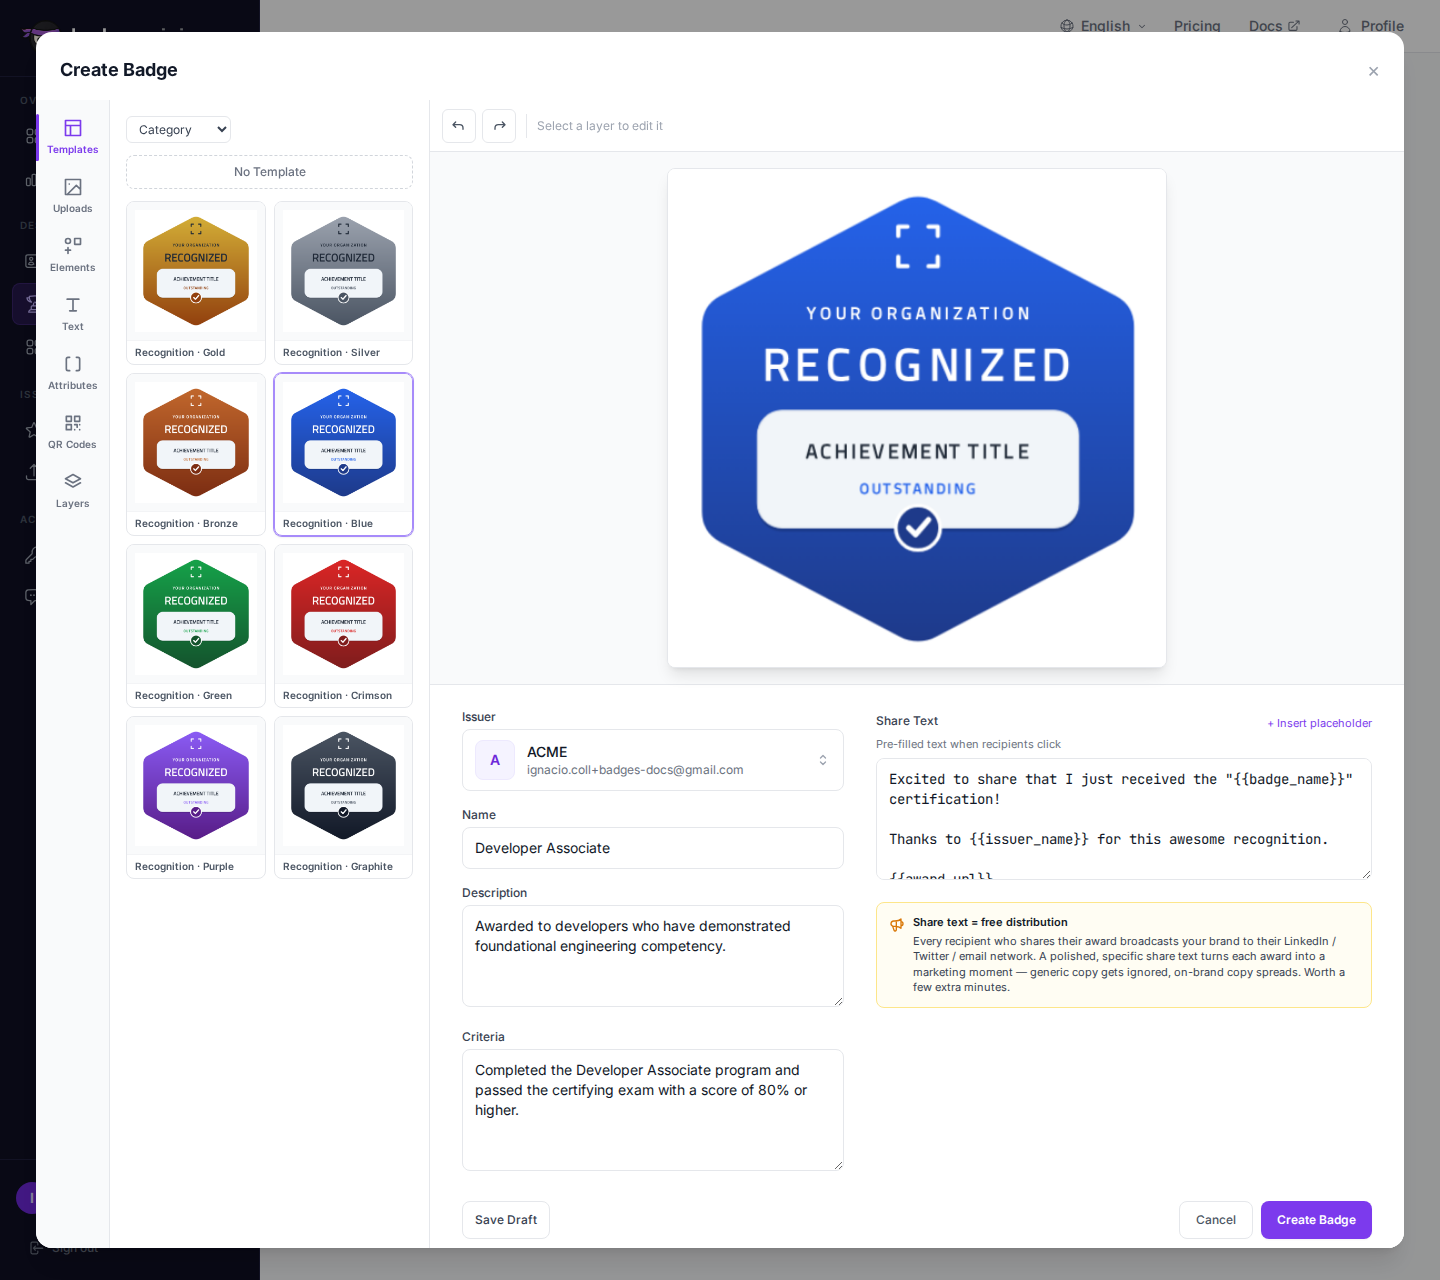
LinkedIn renders your badge’s image next to the certification entry, so it’s worth making sure the badge you’re using for LinkedIn-facing credentials reads clearly at a small, cropped size — LinkedIn displays certification icons quite small in both the profile view and the feed-share preview. If you haven’t set up your visual badge yet, walk through designing your first verifiable certificate before you start driving recipients toward the Add to Profile button; a badge with a strong silhouette and clear org branding earns more clicks and more shares once it’s live on someone’s profile.
Setting this up at scale
If you’re issuing to a cohort — a bootcamp graduating class, a conference’s full attendee list, a quarterly compliance training rollout — the LinkedIn organization ID only needs to be set once per issuer, not once per recipient or once per badge. Combine it with a bulk award run and every recipient in that batch gets the same pre-filled button automatically. See how to issue Open Badges from a CSV for the bulk-issuance walkthrough — pair it with this LinkedIn setup and a whole cohort can go from “training complete” to “credential live on LinkedIn” within the same afternoon.
It’s also worth thinking about how this compares to LinkedIn’s own built-in credentialing tools. LinkedIn Skill Assessments live entirely inside LinkedIn — no issuer branding, no external verification page, no portability if the recipient ever wants to prove the credential somewhere LinkedIn isn’t the audience. An Open Badge with the Add to Profile button gets you the best of both: full LinkedIn visibility through the same “Licenses & Certifications” surface recruiters already scan, plus a standards-based, independently verifiable credential that isn’t locked to a single platform. For a deeper look at when to use which (or, more often, both together), see LinkedIn Skill Assessments vs Open Badges.
What if you manage more than one issuer?
Organizations with multiple issuer profiles — a university with separate issuers per department, an agency issuing on behalf of several client brands — often ask whether the LinkedIn organization ID has to be the same everywhere. It doesn’t. Each issuer on badges.ninja carries its own LinkedIn organization ID independently, so a department that runs its own LinkedIn Company Page can point recipients at that page’s credentials, while a department without one can either leave the field blank (recipients fall back to the manual entry path) or point at the parent organization’s page instead. There’s no requirement that every issuer under one account shares a single LinkedIn identity.
This also means the setup travels cleanly if you reorganize later. If a sub-brand spins up its own LinkedIn Company Page after a year of issuing under the parent org’s ID, updating the field on that one issuer is enough — every award already issued, and every award issued afterward, picks up the new organization ID the next time its verification page is loaded. Nothing needs to be re-issued, backfilled, or migrated.
Recap
- Find your LinkedIn organization’s numeric ID from your Company Page admin view.
- Paste it into your issuer’s settings on badges.ninja.
- Every award for that issuer — retroactively and going forward — renders an Add to Profile button.
- Recipients click once, confirm a pre-filled dialog, and the credential lands correctly linked on their profile.
No developer time, no LinkedIn app review, no per-badge configuration. Set it once at the issuer level and let every future award benefit from it.
Ready to issue your first verifiable credential? Start free at badges.ninja — visual designer, public verification page, PDF certificate, Open Badge v2.0 output. No credit card required.
About the author
Nacho Coll
Founder & Engineer at Badges Ninja
Nacho founded Badges Ninja to make issuing verifiable digital credentials as simple as a single API call — Open Badge v2.0 badges and certificates, minted, hosted, and verifiable without standing up your own issuer infrastructure. Writes about the Open Badges spec, credential verification, and running a credentialing platform serverless on AWS, from the operator side of the wire.